(Part 1: Set-up)
HubSpot provides a great and intuitive IDE (Integrated Development Environment) for developing various assets like Templates, Modules, CSS and JS files. It also provides support for detecting syntax errors while developing assets. The HubSpot IDE provides various formatting options ranging from code editor theme, font and font-size, tab-width and other spaces as well as other options pertaining to code editors. For developers who are getting started with the HubSpot Design Manager, the HubSpot IDE is the best place to start development. However, HubSpot also provides an option to support local development so that you can develop assets using your favorite IDE and convenient settings and upload it to the HubSpot File System. Hi! This is Sumeet Hande, a front-end engineer at Addend Analytics and in this article, we will dive into how we can use the HubSpot CLI (Command Line Interface) for locally developing HubSpot assets.
Step One: Downloading and Installing NodeJS.
We need NodeJS installed on our system for using the HubSpot CLI. Head over to nodejs.org/download section for downloading the latest version of NodeJS.

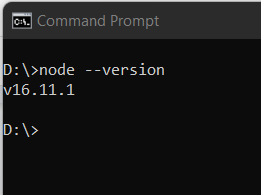
Depending on the OS you are currently using, you can select the appropriate package for download. It is preferred to download the LTS (Long Term Support) version as it is the stable version. The Current version contains the latest features which may or may not be tested and thus has the potential for bugs. During installation, make sure to check the “Add Path to Environment Variable” option so that NodeJS gets installed globally in the system. This means that while using the Command Prompt, we can access NodeJS from any directory or folder. If NodeJS is not installed globally, everytime we need to use it, we have to open the Command Prompt in the directory which contains the NodeJS files. After NodeJS installation is complete, we need to open a terminal or a Command Prompt window. To check if the installation has been successful, we can type the command “node –version” to check the node version.
A version number displayed indicates successful installation.
Step Two: Installing the HubSpot CLI.
To install the HubSpot CLI, in the command prompt, type the command
npm install -g @hubspot/cli
‘npm’ is the Node Package Manager from NodeJS. This will install the Hubspot Command Line interface. The ‘-g’ indicates that the HubSpot CLI will be installed globally so that it can be accessed from any directory from the command prompt. If you want to install the CLI locally in the current directory, omit the ‘-g’ parameter from the command keeping the rest of the command as it is. To check the version, type the command
hs –version

Step Three: HubSpot CLI initialization.
When the hubspot CLI is used for the first time, we need to initialize it. Before we do that, it is recommended to create a separate directory and open a command prompt in that specific directory. Also, Keep your hubspot account logged in your default browser.
To initialize the HubSpot CLI, we use the command
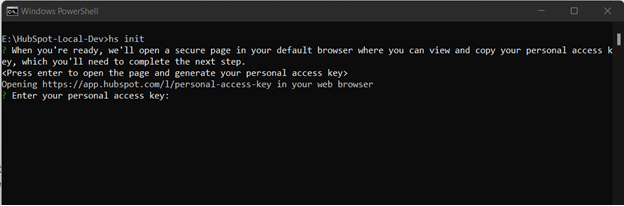
hs init

As the above snippet indicates, after pressing the enter key, the HubSpot CLI opens up your default browser and your HubSpot account. If you have multiple accounts, you have the option to choose for which HubSpot account you want to set up local development. After selecting the HubSpot account, you will be directed to a page which look like shown below:
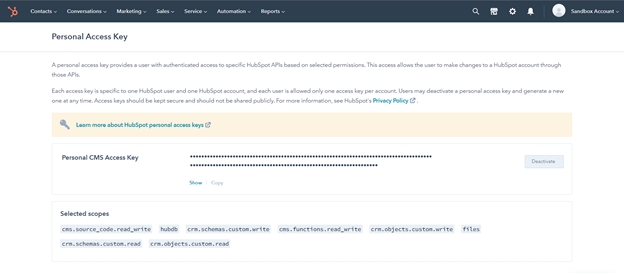
Click on the “show” button to reveal your access token. Then click on the “copy” button next to it to copy the access token to the clipboard. We need to paste this access token in the currently running Command prompt window.
After pasting the access key and pressing enter, you have to choose a unique name to reference this hubspot account. This name will be used later while using the hs commands to access files. After this process is complete, a yml file gets created in the current directory, storing all the necessary information about the Hubspot account for which the local development was initialized.


It states the default portal and the details of other portals/accounts with their IDs and unique names. This is the unique name which we had given to the account during the initialization step. In case of multiple accounts, it is possible to choose a default account using a simple command. Type the command in the command prompt,
hs config set default-account [Identifier]
Here, the Identifier is the account’s unique name or the Portal ID. For example,
hs config set default-account Sandbox-Account
hs config set default-account 8839970
The process of initialization using hs init needs to be performed only once. After this process is complete, if you wish to add more accounts, we use the command
hs auth
and follow the same process described above. This will add more accounts in the same hubspot.config file and it can be found under the portals object.
So in three simple steps, we can easily add our HubSpot account locally with the help of NodeJS and the HubSpot CLI. In the next article, we will go through how we can use various hubspot commands to control the assets locally.